Feb 25, 2012

Yogurt Panacotta with Strawberry Jelly


I've always wanted to make Panacotta from the time I have heard about it. Though its an Italian dessert many Italian restaurants that I have been to do not serve this gorgeous , melt-in-your-mouth dessert !!
Pannacotta is an Italian dessert made by simmering together creammilk and sugar, mixing this with gelatin, and letting it cool until set. (Source: Wikipedia )

The moment I saw a recipe for Yogurt Panacotta wih Starwberry Jelly from the blog Closet Cooking , I knew I had to try it.
The Yogurt would make the dessert healthy and it was something I always had in my fridge and so that's how I  served this dessert at my Valentines Day dinner and boy was it amazing !! :-)
I had all the other ingredients too at hand and the recipe was so easy , you just couldn't go wrong.


I used Regular whole milk Yoghurt instead of Greek and it still came out great. Manish simply Loved it and kept asking for more and  I took some to office to share with my colleagues and they really enjoyed it!! 
The strawberry Jelly wasn't enough to fill over all the dessert glasses into which I had set the Yogurt Panacotta, so we just ate them plain and the Vanilla flavoured Yogurt Panacotta was so good I'm thinking i'll post about  it separately.

Yogurt Panacotta with Strawberry Jelly Recipe
Recipe source : Closet Cooking
You'll need 
For Yogurt Panacotta
Unflavored Gelatin - 1 envelope  (2 1/4 teaspoons)
Water - 3 tablespoons 
Heavy cream - 1 cup 
Sugar - 1/3 cup 
1 vanilla bean (split and seeds scraped)
Yogurt - 1 can of 16 ounce  ( Regular Yogurt or Greek Yogurt )
For Strawberry Jelly
Unflavored Gelatin - 1/2 envelope 
Water - 3 tablespoons 
Fresh Strawberry puree - 1 cup 
Lemon Juice - 1 tablespoon 
Sugar -1/4 cup 


Directions
For Yoghurt Panacotta
1. Sprinkle the gelatin into the water in a bowl and let sit until softened, about 5 minutes.
2. Bring the cream, sugar and vanilla seeds to a simmer in a small sauce pan until the sugar has dissolved.
3. Remove from heat and mix in the gelatin.
4. Whisk the yogurt in a bowl until smooth.
5. Whisk the cream into the yogurt.
6. Pour the mixture into desired bowl or ramekin or dessert cups and chill in the fridge for at least 3 hours.
(I was able to fill into six 7oz dessert glasses as shown)

For Strawberry Jelly
1. Sprinkle the gelatin into the water in a bowl and let sit until softened, about 5 minutes.
2. Simmer the strawberry puree, lemon juice and sugar until the sugar is dissolved.
3. Mix the gelatin into the strawberry mixture.
4. Remove from heat, let cool, pour it over the panacotta and chill in the fridge until set.


It was definitely a knockout dessert both in looks and taste and its definitely gonna be my go-to dessert when friends come over !! Don't you think so too ? :-)

The rest of the menu items will be posted soon...so keep watching out for this space for more interesting dishes and recipes!

-Manju

Feb 19, 2012

Our Valentines Day candle light dinner....


I know Valentines day is long gone , but since both of us were working that day, I decided to postpone the celebration so that it would be just perfect.
Of course I received Roses , a card and a gift from my Hubby on the actual V day and I gave him a card with an invitation for a Romantic candle light dinner for Saturday  to spend some time by ourselves, enjoy good food and be lazy, which is a very rare thing considering the fact that we have a 7month old at home. :-)
So yesterday was Our Valentines Day!!

Well I had the menu all planned out and I had some ideas on how I wanted our dinner table to be set and arranged. We had our romantic songs all sorted out in my laptop . I even bought  a decorative wall hanging , but I forgot about that ! :-)
Hubby did the honours of bringing in the centerpiece and the candles.
Even though my hubby was my Guest I wanted it to be perfect and him to feel like he had a great time . There were some delays here and there, running behind the baby and getting the food warmed up after each course  and all that, but must say that I was totally satisfied by how it turned up and so was Manish!

Another funny thing was we forgot to turn out the lights for our romantic candle light dinner until dinner was over :-) , coz of all the above said distractions , but later (once the baby was tucked in) we did turn out the lights and just sat and relaxed and listened to sweet and light hearted romantic songs . Anyway I thought I should share our beautiful evening with you all.
This is how our final dinner table setting looked like. I checked some sites online to decide on the cutlery arrangement, though dessert spoon and fork should be kept above the plate, I din't have place there so just kept it next to the main course spoon and fork respectively.


Manish and Manav took their seats, the music was on :-) and I know Manish was all excited, hopefully the baby too...Well he was already fed , so he just had to sit and enjoy though he did get bored at times and we had to keep entertaining him, but he was a sweety throughout!
Now for the menu, I wanted something different from our daily routine food and I wanted something classy. I planned on a 4 course meal.  I din't stick to any particular cuisine and instead ended up offering Indian for 1st course, Thai for 2nd course, combination of Jamaican + Mexican for the main course and Italian for dessert! :-) Any guesses??

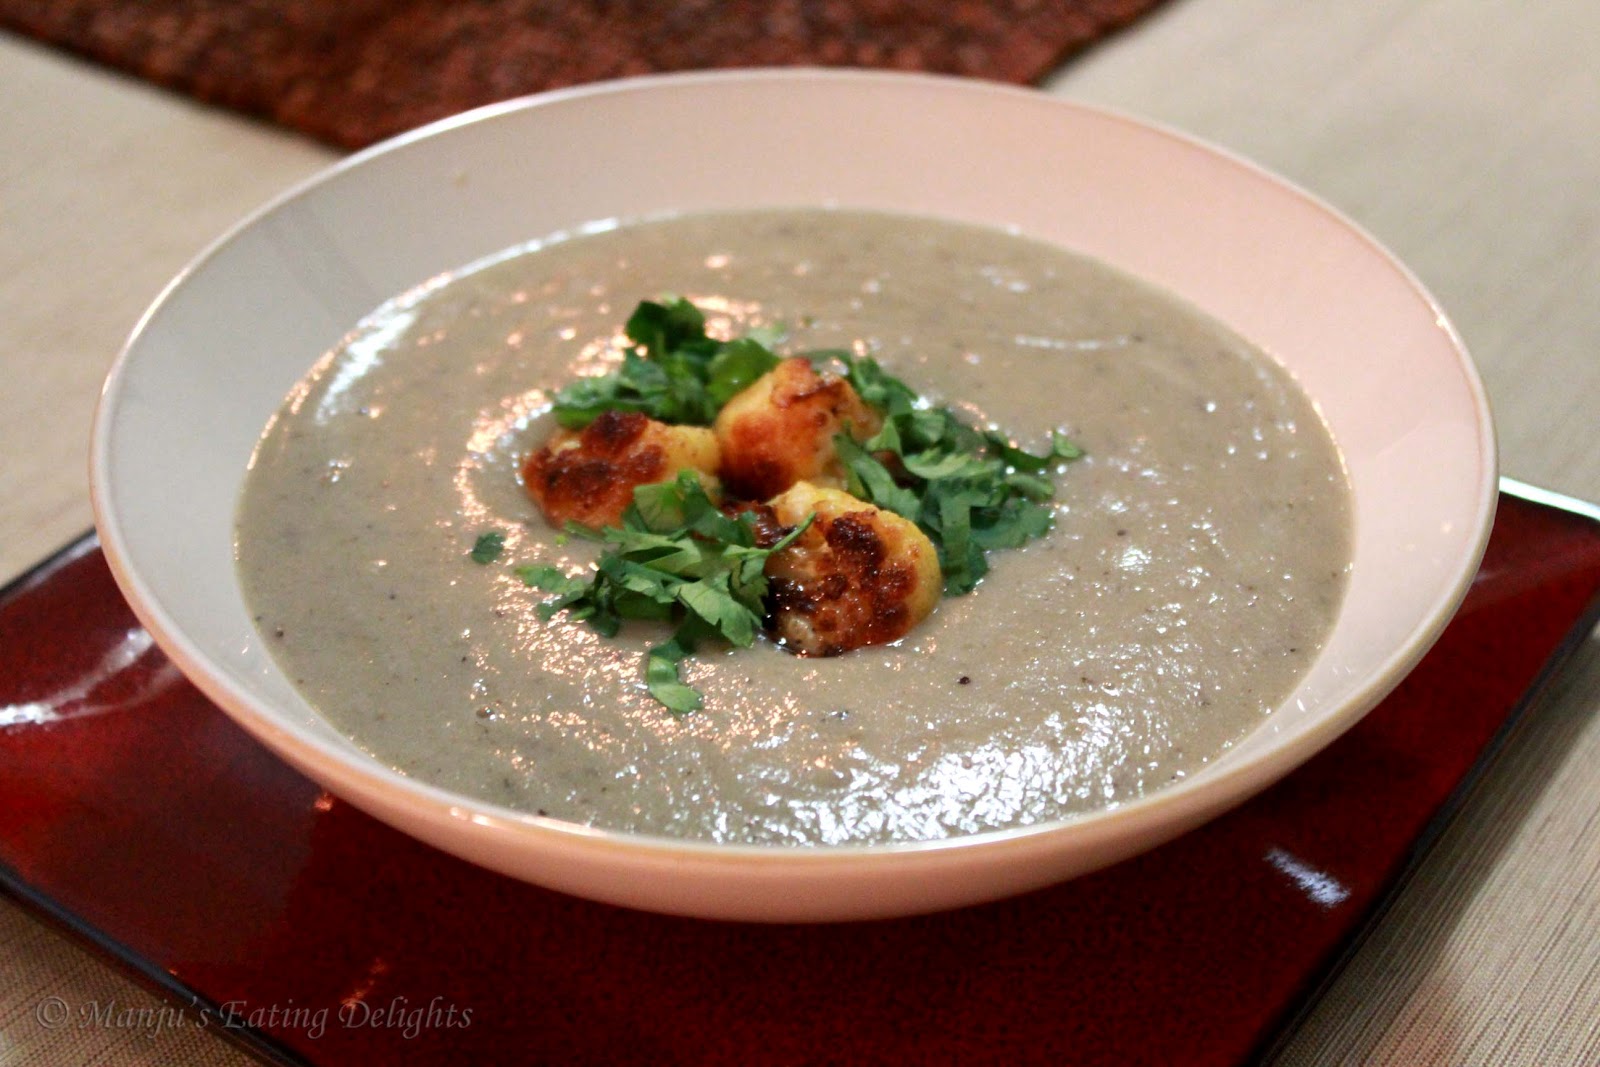
I wanted soup for my 1st course and recently on several blogs I had seen this really simple and easy Creamy Cauliflower soup. I took the recipe from Kankana's blog which I love! I added extra crushed pepper though, so Creamy n Peppery Cauliflower soup!
(Click here for Recipe)

My next course was meant to be like a second appertizer course. I came upon this really good Thai Fish Cake recipe online (Delia Online). I had all the ingredients and it was really simple.
I prepared them into small balls and made a tangy Lime and Cilantro Mayo dip (which was my own recipe). They were perfect and Manish , a fish lover, simply loved the flavor combinations!
(Click here for Recipe)

For the main course, I have heard about how good Jerk chicken is from few friends and I knew I wanted to try that. I also prepared some Coconut Rice, a mild coconutty flavored rice to go with the spicy chicken. Both recipes are from here (Food Network by Nigella Lawson) - my Jamaican/Carribean side of the main course.
I noticed Jerk chicken being paired with mango or peach salsa on several websites, so I though why not add that too, so that's my Mexican dish :-)
(Click here for Jerk Chicken Recipe)

Now I wanted a knockout dessert and I have been craving to try out Panacotta for some time now.
I saw a beautiful and really easy recipe for Yoghurt Panacotta with Strawberry Jam from here (blog named Closet Cooking). I followed the recipe exactly and a knockout dessert it was! Manish loved it and it tasted  and looked awesome.
(Click here for Recipe)
The dinner was an absolute success and Manish said he will forever remember this night. I'm so happy :-)
 I may do similar dinners again but this one will forever be my favorite!

I will post the recipe of all the above mentioned dishes soon and let me tell you, they were really good , really easy and you must try them. I started cooking yesterday at 12:00pm and I was done before 5pm. I mean for a 4 course meal from scratch that's a really small time (I marinated for the Jerk chicken previous night though ).
Hope you all enjoyed reading and I do hope you'll be waiting for the recipes!!

Linking this post to:
1. Valentines Day event hosted by Anzz @ AnzzCafe


- Manju


Feb 7, 2012

Devil's Food Cake...a Bundt cake


This cake is going to be the best Valentines day cake you could ever make for your loved one...If you are a real chocolate lover, this cake is the one for you.

Its so Chocolaty, so dense and rich , its just perfect! The cake just sticks to the roof of your mouth , which makes it so yummy :-) The secret ingredient in this cake is Coffee!!! :-) But you will not get the taste of coffee , it just adds the chocolaty richness.
My hus got me this really beautiful book called Illustrated Step-by-Step Baking by Caroline Bretherton,  for our Wedding Anniversary (which was in Dec). This book is great for beginners in Baking , and several recipes have step by step pictures, which is very helpful.

This cake is my first try from this gorgeous book and I must say it came out simply great. I'm not yet at the point of writing a review on this book, but I hope I'll soon try out more and let you know more details.

I coated the cake with some milk chocolate ganache and some white pearls.

Devil's Food Cake Recipe
Recipe source: Illustrated Step-By-step baking by Caroline Bretherton (page 58)
You'll need :
For Cake
All purpose flour - 1.5 cups
Baking powder - 1.5 tsp
Unsalted Butter - 7 tblsp + extra for greasing the cake pan
Coco powder - 1/2 cup + extra for dusting the cake pan
Sugar - 1.5 cups
Eggs - 2 ( at room temperature)
Cold strong Coffee - 1/2 cup (I added 1 tblsp instant coffee (Bru) to 1/2 cup cold water)
Milk - 1/2 cup
Pure vanilla extract - 1 tsp
Salt - 1/2 tsp
For Ganache
Semi-sweet chocolate chips - 1/2 cup
Unsalted Butter - 1 tblsp
Sweetened Whipped cream - 2-3 tblsp
Milk (optional) - few teaspoons to loosen the ganache

Directions :
For Cake
1. Preheat the oven to 350F. Grease your cake pan ( I used a Bundt cake pan) with some butter and dust the pan with some cocoa powder.
2. In a bowl whisk together the all purpose flour, baking powder, cocoa powder and salt.
3. In another bowl mix together the cold coffee, milk and vanilla extract.
4. Using a hand or electric mixer cream together the cream and sugar until light and fluffy and beat in the eggs one at a time . Slowly add in the dry and wet ingredients ( #2 and #3) and mix the cake batter well.
5. Bake for 30-35 mins or until a totthpick inserted in the cake comes out clean.
6. Leave the cake in the pan for about 20 mins to cool.
For Ganache
1. Melt together the butter and chocolate chips (in a microwave or in a bowl over simmering water, without touching the water).
2. Fold in the cream and make a smooth ganache.
3. Add some milk if you feel the ganache is too thick, but it should be slightly thick and runny.
4. Pour over the cake after the cake has cooled and let the ganache set for sometime before serving a slice.
Decorate with some sugar Pearls if you'd like.
I made the cake in the evening, and we just had to eat a slice for dessert that night. I took few pics that night as well as few in the morning...This one below was taken in the morning. The cake tastes better and better each day.

See how dense the cake looks and it so smooth and crumbly...Chocolaty Heaven! :-)


Enjoy people and have a beautiful Valentines day!!!


Linking this post to:
1. Valentines Day event hosted by Anzz @ AnzzCafe


-Manju

Jan 26, 2012

Spaghetti Rigati with Mixed Veggies & Paneer in Thai Red curry sauce


We usually go to a thai-chinese restaurant in our neighborhood where I always, always order their stir-fry noodles with Thai yellow or green curry sauce. Its my absolute favorite and I have never ordered anything other than that when I go there.
First there is the fact that I can fill up my bowl with whichever veggies from their 'veggies for stir-fry' counter and then there is the option of whether I want noodles, rice or fried rice and next is which protein I'd like, where I always end up ordering their noodles and grilled chicken respectively. :-)

Now last night we had been planning on going out and eating , but the climate wasn't so great and my
6.5 month old keeps me busy , so instead I thought of making a similar version of the stir-fry with whatever I had at home.
I had some Spaghetti Rigati , which is a sophisticated version of the actual spaghetti in the sense that it has grooves on its sides, which perfectly helps in coating the sauce better on the pasta. Then I had all the good veggies and for my protein I used Paneer ( Indian Cottage cheese), which is my favorite...yumm!!
I had Thai Red curry paste brought from the store and coconut milk and Thats all you need!!!


This recipe makes enough pasta for 2-3 people.

Spaghetti Rigati with Mixed Veggies & Paneer in Thai Red curry sauce Recipe
You'll need
Spaghetti Rigati - 1/2 lb ( I used Barilla) - You can use any pasta you like
Hot boiling water - to cook the pasta
Mixed Veggies - 2-3 cups ( I used frozen mixed veggies containing - Brocolli, Baby corn, Carrots, Red peppers, Onion, Beans, Sugar snap peas, Mushroom and Water chestnuts)
Paneer - 1 cup (cubed into small pieces)
Thai Red Curry paste- 2 tblsp
Coconut milk - whole 14oz container ( I used Aroy-D brand)
Oil - 1 tblsp ( to mildly fry the paneer cubes)
Salt - as needed for the pasta and for the thai red curry sauce
Red chilli flakes - a pinch or 1/2 tsp ( optional )
Minced Ginger - 1 tsp (optional)

Directions
1. In a large pot keep some water to boil and when it starts bubbling add enough salt to season the spaghetti and add the Spaghetti. (Cook the pasta as per packet instructions.)
2. Meanwhile, heat a non-stick kadai or skillet on medium heat and add the 1tblsp of oil. When it gets hot add the cubed Paneer (Indian cottage cheese) and saute until it gets mildly browned on both sides or atleast on one side.
3. Keep the Paneer aside in a bowl and add the mixed veggies to the skillet and saute for just 1-2 minutes. Keep the veggies aside. (You do not want the veggies to be over cooked, it should still be crunchy)
4. Now reduce the heat, and add the coconut milk and the Thai Red curry paste and stir for a while until the sauce thickens. Season with salt as needed. [You may also add some red chilli flakes and minced ginger at this point. I did not add both but I wish I had, it would definitely elevate the taste].
5. Toss in the veggies and paneer and stir well.
6. By now the pasta should be done, when its al dente , drain away the pasta water and add the pasta directly to the Thai red curry sauce and veggies. Coat the pasta well with the sauce and cover and cook for  2-3 minutes. Serve hot!

Suggestions:
a. Like I mentioned some red chilli flakes and ginger would add some spice to the dish for those who like a bit of spice.
b. If you want  the sauce to get dried up with the pasta, keep cooking the pasta in the sauce till the pasta drinks up or coats up all the sauce on the pasta. [ This is how I have prepared here ]
c. If you'd like some sauce with the pasta ( like a soggy pasta) , just cook the pasta with the sauce for few minutes and turn off the heat and serve immediately. The more time the pasta sits in the sauce the more it gets absorbed into the pasta. [ I would have preferred this , as it would make the pasta more juicy :-) ]
d. You can use Chicken , Beef , Egg , Tofu etc for the protein instead of Paneer if you'd like.


The pasta turned out absolutely great and my hus was asking for seconds and thirds. :-) It was creamy and had a perfect Thai Red curry taste and had all the veggies to make u feel like we ate something healthy, the Paneer was a real treat.
Now I have my own little restaurant style dish with my own unique taste. I added lots of veggies and less pasta to make it more healthy and it was just perfect!

And while I was wrapping up my  photo session of the spaghetti, look whats happening in the background. :-)
The pic isn't so clear as my camera shook, obviously, as he just grabbed on to the bowl with lightning speed and I had to grab the bowl myself to stop him from dropping the pasta all over the place...aaaah Babies!! ;-)


Have a great day people...
Are you all waiting for Valentines Day? :-)


Linking this post to:
1. Valentines Day event hosted by Anzz @ AnzzCafe


-Manju


Jan 23, 2012

Mattar Paneer ( Indian Cottage cheese with Green Peas)


Mattar Paneer needs no special introduction. Its a very commonly served North-Indian vegetarian dish at most Indian restaurants and definitely a favorite among almost everyone. At my house everyone loves Paneer (Indian Cottage cheese). Several people make their own Paneer at home, but I haven't tried that yet, so I used store-bought Paneer.

I initially thought of making a Paneer dish on it own, but the health conscious part of me finally decided to add Green peas , but guess what, it turned out even better !! I'm so proud of myself (secretly) :-)

I have adapted this recipe from Showmethecurry.com from their video on Youtube. But I have made a few changes as per my requirement.

Mattar Paneer Recipe
You'll need
Paneer (cottage cheese) - 14oz pack,cut into small cubes
Green Peas - 1 cup (frozen or fresh)
Ginger-Garlic paste - 1 tbsp
Tomato - 3-4 medium sized (pureed/crushed)
Canola oil - 2 tbsp
Paprika - 2  tsp (Can substitue instead with 1tsp red chilli powder and 1tsp paprika for spice and color)
Corriander powder - 2 tsp
Garam masala - 1.5 tsp
Water - 1 cup
Low-Fat Evaporated milk - 1 cup ( can also use Heavy cream instead )
Salt - to taste

Directions
1. Heat the oil in a non-stick pan and add the ginger-garlic paste and saute until it starts turning mild brown.
2. Now add the pureed or crushed tomato and cook it until the water content has drained off and the oil starts showing.
3. Add the spices - Paprika, Corriander powder and garam masala and saute for 2 mins.
4. Add the Green Peas, 1cup water and salt and cover and cook for 3-4mins (or until peas become soft)
5. Now add the cubed paneer and mix well and cook again for 2-3 mins on medium heat. (the paneer cooks very fast and over cooking can make it either very hard or mashed up)
6. If more gravy is required you can add more water and cook.
7. Lastly add the evaporated milk - this provides a nice creamy texture and also elevates the taste of the dish (For a richer and creamier version you can use a cup of Heavy cream )
8. On low heat, let the dish simmer for few more minutes. Check salt and spice levels once more and then take it off the stove.


Mattar and Paneer makes a perfect combination and I prepared a creamy tomato gravy and all we could do was to just keep dipping our naan into the luscious gravy and eat and eat and you won't realise how much you've eaten until you've stuffed yourself up. Rice, Roti or even Bread goes well with this dish. So enjoy!! 

-Manju

Jan 9, 2012

Curried Veg Pulav (Veg Pilaf)

I named this dish as 'Curried' Veg Pulav as I have used the spices with which I prepare any basic masala curry used in Indian cooking :-) Pulav or Pilaf is a really easy rice based dish where veggies ( in the case of my dish) are cooked along with the rice seasoned with some spices. It is a really simple and easy preparation. Pulav can also be prepared with chicken , shrimp, egg etc
This dish was initially supposed to be a mixed vegetable curry :-) , but at the last moment I decided to go with making a quick pulav with the same mixed vegetables to which I had already added all my spices to prepare the curry. So there you go, Curried Veggie Pulav !!! :-)
I just used  some frozen mixed vegetables (containing carrots, green peas, beans and corn)  that I always have in my freezer , one potato and half of a green bell pepper (capsicum) for the mixed veggies. You can use whichever veggies you prefer.

Curried Veg Pulav Recipe
Recipe source : My Own
You'll need
Basmati rice - 2 cups
Water - 4 cups
Mixed Vegetables ( Carrots, Peas, Beans, Corn, Potato, Bell pepper etc) - 2 cups (cubed into small pieces)
Onions - 1 large ( cubed ) - I used Yellow Onions
Whole spices (Peppercorns, Cloves, Cardamom, small Cinnamon stick ) - 2-3 of each
Red chilli powder - 1-2 tsp
Corriander powder - 1 tblsp
Garam masala powder - 1 tsp
Turmeric powder - 1 tsp
Pepper powder - 1 tsp ( optional)
Oil - 2-3 tblsp ( I used Canola)
Salt - to taste

Directions
1. Wash the rice in cold water and drain and keep it aside. ( If you have the time, its best to soak the rice in water for 30minutes and then drain before preparing the pulav, I did not do it though)
2. Heat a large cooking pot and add the oil.
3. Saute the whole spices in the oil until the flavors are released.
4. Add the onions and saute for 2 minutes.
5. Add in all the mixed veggies and after sauting for 2 minutes, add the spices ( red chilli powder, corriander powder, garam masala powder, turmeric powder and pepper powder) and saute for another 2-3 minutes.
6. Now add in the rice to the mixed veggies and stir gently until rice and veggies are mixed well .
7. Add 4 cups of water and season the water with salt , stir once more and cover and cook until the rice is cooked fully. ( The water should be salty to taste so that the rice is seasoned well once cooked)    
                             
7. Serve it hot with some cool cucumber Raita !

This dish can be prepared so fast and can be served without requiring to prepare too many side dishes, as it is rice + mixed veg curry in one !! :-) Some plain Yoghurt or Cucumber Raita along with some Papad goes really well when serving this dish.
The house gets filled with the lovely aroma of basmati rice being cooked and the lovely spices added to this dish. The Pulav was really good, the rice was soft and perfectly cooked , the veggies and the spices mingled really well with the rice and it did make a really quick , tasty and colorful lunch for us :-)

Have a sweet day!!

-Manju


Jan 7, 2012

Mixture with Sev, Masala Peanuts and fried Curry leaves...Crrrunch!!


First of all let me wish all my lovely readers a very very Happy New Year (better late than never right !! ). May this year bring you joy, happiness, prosperity, wealth and good health.

Instead of starting the New Year with something sweet we wanted something savoury :-) and a lovely evening snack like this Mixture was just perfect. It can be prepared and stored in air-tight containers and can be enjoyed for several days.

I prepared the mixture with a combination of  Sev made from Besan (gram flour), Spiced besan coated Peanuts - Masala peanuts and fried Curry leaves. 
For those who prefer a spicier version you can sprinkle some red chilli powder along with some salt over the mixture and mix well or else spice up the besan with which the Sev is prepared. Its all upto you! :-) I did not want a very spicy snack, so this recipe is a bit on the milder side.


For preparing the Sev I used a Murukku maker or the same thing I used to make my Idiappams :-)

Mixture Recipe
You'll need
For Sev:
Gram flour - 2cups
Water - enough to make a dough
Red chilli powder - 1-2 tsp
Turmeric powder - 1 tsp
Pepper powder - 1-2 tsp
Salt - to taste
For Masala Peanuts:
Raw Peanuts - 1 cup
Gram flour - 2-3 tblsp
Water - enough to mix the flour with the peanuts forming a thick coating
Red chilli powder - 2 tsp
Turmeric powder - 1 tsp
Pepper powder - 2 tsp
Garlic paste - 2 tsp ( I did not add this, but it would bring huge flavor if added)
Salt - to taste
For fried Curry leaves:
Curry leaves - 4-5 springs ( approx 15 - 20 leaves)
Oil - for deep frying and preparing the entire mixture items ( I used Canola)

Directions
For Sev:
1. Take the gram flour in a mixing bowl and add all the spices ( red chilli powder, turmeric powder, pepper powder) and salt and using water make a smooth dough. (It may be a sticky dough but thats ok)
2. Apply some oil on your palm and take a nice handful of the dough and fill it inside the Murukku or Idiappam maker. The stencil used should of small dots such that the dough when pressed will come out as thin strings.
3. Heat oil in a deep frying pan and press the dough into the oil and continue to do so in circular motions without breaking the strings. (It will look like one big ball of strings :-) )
4. Break the strings into small 1 inch length pieces, or simply break it apart into smaller length pieces. Sev is ready :-)
For the Masala Peanuts:
1. In a mixing bowl add 2-3 tblsp of the gram flour with the peanuts and some spices ( Red chilli powder, Turmeric powder and Pepper powder) , some Garlic paste (if you like) and salt to taste and mix together with some water. The gram flour should stick to each peanut like a thick coating.
2. Heat some oil ( or you may use the same oil used to fry the Sev) and drop in each peanut one by one. Its ok if  few peanuts stick together.
3. Fry them until nice and golden brown ( else the peanut may not get fried well and may still be raw inside)
For the Fried Curry Leaves:
1. Take 4-5 sprigs of curry leaves and fry them in the same oil until crisp. 
For the Mixture:
1. Mix together the Sev , Masala Peanuts and the fried curry leaves. A crispy and crunchy snack is ready ! 

Store them in air-tight containers and they will stay crisp for several days. I'm enjoying this delicious snack even while I type this right now, its simply so yumm and irresistible!
Hope you all are enjoying the New Year with lots of good food and lovely people around you!!

-Manju


Dec 29, 2011

Shrimp Dry Roast...deliciousness on a plate !!


I love having Shrimp , my mom makes the most amazing Shrimp curry I have tasted. Any time we go to any seafood restaurants I always end up ordering some shrimp based dish or salad.

However Manish cannot have any shellfish as he had some allergic reaction to it as a child and is afraid that he may be allergic to shellfish, so preparing shrimp is off our menu list. So after our wedding this is the first time I am actually making shrimp at home. Thanks to my sis-in-law who came over for the holidays, I had an excuse to prepare and someone to share the dish with :-)
I initially thought of making simple Kerala style spicy shrimp fry...then I thought of making it a bit more interesting by making a dry roast like dish where I roasted some shallots, ginger-garlic and curry leaves until the curry leaves are crisp and added it to the fried.shrimp. This added some additional flavour and the dry masala tasted simply awesome.

Shrimp Dry Roast Recipe
Recipe source: My own
You'll need
Shrimp or Prawns - 1 lb ( I bought large Gulf Shrimp)
Red chilli powder - 1-2 tsp ( depending on how much spicy you prefer)
Turmeric powder - 1/2 tsp
Pepper powder - 1 tsp
Ginger-Garlic paste - 2 tsp
Water - 2-3 tsp (or enough to marinate the spices on the shrimp)
Small Pearl Onions or Shallots - 6-7 ( sliced)
Minced Ginger - 1 or 2 tsp
Minced Garlic - 1 or 2 tsp
Curry leaves - 2springs (about 8-10 leaves)
Salt - to taste
Oil - for frying shrimp + 2tblsp ( I used Canola oil, Coconut oil would provide an authentic keralite flavor)

Directions:
1. Wash and clean the shrimp. (Mine was already cleaned with the Tail on , I used it as it is after washing)
2. Take the shrimp on a plate and add the red chilli powder, turmeric powder, pepper powder, ginger-garlic paste and salt and add a little water and marinate evenly on each shrimp. Refrigerate for 15-20mins to marinate well.
3. Heat some oil (about 4-5 tblsp) in a non-stick pan and add the shrimp and let them fry. Keep the pan aside. (Do not over-fry shrimp as it tends to turn rubbery.)
4. In another non-stick pan, add 2 tblsp oil and add the shallots (or pearl onions) , minced ginger , minced garlic and curry leaves and keep roasting until the curry leaves are fried crisp and the onions are nicely carmelised.
5. Add this dry roasted mixture into the pan with the fried shrimp and mix very well, such that the onions and curry leaves are coated with the masala from the fried shrimp.

Serve hot with plain rice or chapathi .

This dish was really nice and spicy and shrimp was fried perfectly.The dry masala from the shallots and curry leaves tasted superb , all in all it was Finger licking good !!

I seriously wished we had made more...Manish was left to enjoy the smells :-)

Hope you all are eagerly waiting for the New Year!! Wish you all a Very Happy New Year 2012!!

- Manju