Jan 31, 2013

Herbs and Cheese Pull apart Bread | We Knead to Bake #1

I have been thinking for quite some time now to try and make some homemade bread. I just love going to the bread baking sections of our local grocery stores where the whole area smells so cozy with fresh bread being baked and I wanted to experience that at home!!
Anyway, I would have still not taken up bread baking if it hadn't been for Aparna Balasubramaniam, who reached out to her friends and fellow bloggers on facebook, asking them if they would be interested in baking one bread a month for the whole of 2013 along with her. She had a list of breads that she wanted to try and thought it would be fun if it was a group event and I'm so proud to be a part of this year long monthly project aptly named 'We Knead to Bake' .
Bread baking is a lot of fun and you can't wait to see the end result. Aparna wanted us to bake a Herb and Cheese pull apart bread for which she had provided recipe and instructions. A pull apart bread sounded like so much fun and it definitely is. Her recipe was eggless and I just loved that.
I started making the dough after breakfast last Sunday. Manish kept hovering around the kitchen tryingto see what I'm upto. I told him I was baking a pull apart bread and he had no clue what that was ;-)

I wanted to make use of the ingredients I had in my pantry and fridge so did not buy anything special for this. I flavored the dough with crushed Garlic and Red chilly. My fillings were simple - roasted Cumin seeds, dry Italian seasonings, low fat Cheddar cheese and few pinches of saumf powder.
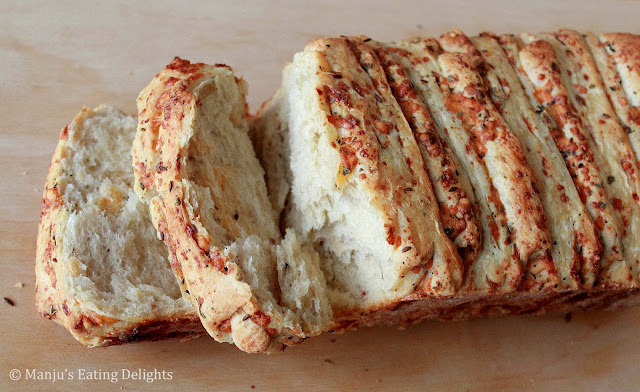
The bread was simply awesome. The dough rose perfectly. I had no fear of using yeast and went and ahead and followed all the instructions in Aparna's recipe and the result was a perfectly baked soft and flavorful pull apart bread loaf. As you can see below, the bread was so porous and soft, perfect to dip into some some sauce or soup and relish on! And the flavors from the herbs and cheese were simply outstanding!
One important step I missed out while setting up the pull apart bread was, I forgot to brush butter over the dough before topping it with the herbs n cheese. Due to this, my dough just stuck to itself while baking and became more like a herb n cheese whole loaf bread than a pull apart bread...so you please don't forget that step!! The butter helps to separate the individual layers after it bakes.

There was some spicy Chipotle dipping sauce in the fridge and half the loaf was over within minutes :-)
For my little guy I spread a little bit of orange marmalade on his slice (in case the red chilli in the dough was too spicy for him) , and he really enjoyed it and ate almost half of a large slice. :-)
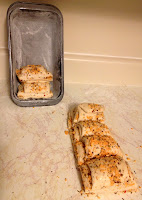
Bread baking takes some time as you want to give enough time for the dough to rise and rest. So a little planning ahead is good!! I've tried to give step wise pics (but my kitchen light is awful, so the pics look yellow :-) )

Herbs and Cheese Pull apart Bread Recipe
Recipe source : Aparna @ My Diverse Kitchen

You'll need
For the Dough:
Warm Milk - 1/2 cup
Sugar - 1 tsp
Active dry yeast - 2 tsp (I used a whole sachet of the instant yeast we get here , almost 2.25 tsp)
All-purpose flour - 2 3/4 to 3 cups (I used 3 cups)
Salt - 1 tsp
Butter (soft at room temperature) - 25gm or 4tblsp
Garlic-Red Chilli paste - 1 to 1.5 tsp (3 garlic cloves + 2 dry red chillies)
Milk - 3/4 cup + 3tblsp for brushing over the bread
For the Filling:
Melted Butter- 15 to 20gm (about 3-4tblsp)
Dried Italian seasoning herbs - 2 tsp (contains dried oregano, thyme, parsley)
Roasted cumin seeds - 2 tsp
Saumf powder - 2-3 pinches (optional for flavor)
Grated cheddar cheese - 1/2 cup

Directions
1. In a small bowl, dissolve the sugar and the yeast in 1/2 cup of warm milk. Keep aside for about 5 minutes till the yeast mixture bubbles up.
2. Grind 3 cloves of garlic with 2 dry red chillies to a coarse paste.
3. Put 3 cups of flour, salt, softened butter, and garlic-red chilli paste in a large bowl (I used my Kitchen Aid stand mixer with the blade) and pulse a couple of times to mix.
4. Then add the yeast mixture and the 3/4 cup of milk and knead (use dough hook if using Kitchen Aid mixer) till you have a soft, smooth and elastic/ pliable dough which is not too sticky. Add a little extra flour if your dough is sticking. Oil your palms and shape the dough into a ball and place it in a well-oiled bowl, turning the dough to coat it completely with oil.
Cover and let it rise for about 1 to 1 1/2 hours or until almost double in volume.
5. Dust your work surface lightly with flour. Deflate the dough and shape it into a square and roll the dough out into a larger square that is about 12" by 12".
6. Brush the surface of the square with the melted butter. Evenly sprinkle the herbs, cumin seeds, powdered saumf and  the grated cheese. Use a rolling pin to very lightly press the topping into the dough to ensure the topping doesn't fall off.
7. Using a pizza cutter, slice the dough from top to bottom into 5-6 long and even strips – they do not have to be perfect. Lay each strip on top of the next, with the topping facing upwards, until you have a stack of the strips.(I kept the 2 strips cut from the sides in the middle of the stack so it looks neater and folded up any strips that became too long)
8. Using a pastry scraper or a sharp knife, cut straight down through the stack dividing it into 6 equal pieces (6 square stacks).
9. Butter and lightly flour a 9 x 5 loaf pan. Layer the square slices, cut sides down into the loaf tin.(I kept my load standing vertically and placed each of the cut up slices over the other)
10. Cover the loaf tin dough with a towel (or kitchen towel) and allow the dough to rise for an hour.

 11. Lightly brush some milk over the top of the loaf and Bake the dough at 350F for about 30 to 40 minutes until it is done and the top is golden brown.
I'm really happy with the end results. I took some of the loaf to office and my colleagues too liked it a lot and are now waiting for me to post it on the blog :-) One of my colleagues said its really nice that its not very dense, but a nice airy and fluffy , flavorful loaf.
The other bloggers who took part did some really interesting twists and tweaks to this recipe with different filling options etc and they all look great. Do check them all out , listed at the end of Aparna's post.

Can't wait to see what Aparna is gonna come up with next for February...so until then...Tata!! :-)

-Manju

Jan 26, 2013

Usal with sprouted green moong...a Maharashtrian delight!

In Kerala, the most common prepation with green moong is cherupayar thoran (green moong stir fry with coconut). Rice gruel with some cherupayar thoran and papaddum is a classic combo!
I had soaked some green moong during the day thinking of making some simple thoran , but then totally forgot about them...later that night, I drained the water out and again forgot about them. They graciously sprouted by the next day and when I came back from office, I have a bowl full of moong with lovely little sprouts . I left them as such for one more day and they grew longer sprouts!!

I promptly turned to my  facebook friends for recipe suggestions (other than cherupayar thoran). You see, I wanted to make something special and different. So comes a good few replies like making Chaat, Salad, Misal , Usal etc and I decided to go with the Usal preparation shared by a good friend who shares some yummy Indian recipes at BellaOnline
Usal is a very popular Maharashtrian dish made most commonly with Matki or moth beans (a brown colored oval shaped bean). But you can prepare the dish with green moong just as well. The moong is cooked and then added to a mild masala gravy - the dish can be dry masala or a gravy masala, as per your choice. Mine was semi gravy! I've added a Keralite twist to the dish by adding curry leaves in the dish. It does add a lot of flavor.

Preparing a dish with Sprouts requires some planning ahead but so worth the wait and double the nutrition!
How to sprout moong: Soak 1 cup of green moong (or any lentil of choice) for atleast 6-8hrs or overnight. Drain the water completely and transfer the moong into a cheese cloth/muslin cloth and cover them and let them sit in a dry spot for another 5-6hrs , open and check if they have sprouted to your choice, else just shake them up a bit and again leave it for few more hours. (I actually left mine in the same dish as it was soaked for 2 days after draining the water out - hence got longer sprouts)

Sprouted Green Moong Usal Recipe
Recipe source : Adapted from Sadhana Ginde's recipe

You'll need
Sprouted green moong - 2 cups
Turmeric - 1/4 tsp
Red chilli powder - 1/4 tsp
Salt - to taste
Water - 3 cups (to pressure cook the sprouted moong)
For tempering
Black mustard seeds - 1/2 tsp
Dry red chillies - 2
Curry Leaves - 5-6 leaves
Oil - 2 tblsp
For the gravy
Medium onion - 1 (finely diced)
Ginger - 1/2 inch piece (peeled and finely minced)
Turmeric - 1/4 tsp
Red chili powder - 1/4 tsp
Garam masala - 1/2 tsp (or use Kaala Masala)
Chaat Masala - 1/2 tsp
Salt - to taste
For Garnish
Lemon juice - juice of half a lemon
Freshly grated coconut -2 tblsp  (I din't add this)
Freshly chopped cilantro leaves - a handful
Red onion - cut into thin strips or diced into tiny cubes
Lemon wedges - as per choice

Directions
1. Cook the sprouts in a pressure cooker with 3 cups of water with the spices and salt. Let it whistle for about 3-4 times. (I made mine quite well cooked, almost soggy , so I did about 5-6 whistles)\
2. In a kadai, heat the oil and crack mustard seeds, dry red chillies and curry leaves. Then add the ginger and onions and saute for few minutes.
3. Add the spices - turmeric powder, red chilli powder, garam masala, chaat masala and salt and let it cook foo few minutes.
4. Now add the cooked sprouts and combine well. Finally add the lemon juice.
5. Garnish with chopped Cilantro, grated coconut and diced/sliced onions before serving!

My notes:
3 cups water to cook 2 cups of moong dal may result in it being rather soggy or watery (I wanted that - for my gravy) , but you can cook in a little lesser water if you want a more dry version.

I prefer to flavor my lentils too, so I've spiced up the water in which I cook it. You can avoid that if you prefer. I've also heard that people believe that lentils won't cook well if salt is added to the water it cooks in .I have till date had no issues with my lentils not cooking well, as I always cook them like that to add some flavor into the lentils too.

Chaat masala is not commonly added to Usal preparations, but I saw some recipes using Amchur powder(dry mango powder), so chaat masala was the closest I had for a tangy spice powder , but it added so much flavor, I think it was the star of the dish...apart from my sprouts of course! :-)
 I really enjoyed having the Usal with plain white rice , Manish was simply raving about its unqiue taste and even my little guy gobbled up a bowlful of rice mixed with Usal and Yogurt! A healthy vegetarian dish with a mindblowing effect on your tastebuds! Try it out, you'll love it too I bet!

Oh and if you have any leftover Usal, enjoy it as a chaat topped with some sev, chopped onions , cilantro and/or tomato and drizzled with lemon juice and sprinkled with chaat masala...mmmmm....so yummm!! Thank you Sadhana for all the lovely ideas :-)

-Manju


Jan 19, 2013

Turnip Greens Pachadi...greens in a yogurt base!

If you saw my Red Radish Rasam post, you must have seen this bowl of creamy deliciousness with greens in it. Well it was a simple Turnip Greens Pachadi that I prepared that day to pair with the spicy hot Rasam and it was really good. I'm glad I had taken a few snaps of the pachadi, and I thought why not share this simple and healthy dish!

To be honest, you could just turn any veggie/fruit dish into a Kerala style Pachadi , a type of 'Raita', as long as it has a tadka (tempering) of mustard seeds, curry leaves and dry red chillies. Well thats my take on it! So when I prepared Turnips greens as a side dish, I thought , maybe it may taste better if I added some yogurt and it really did taste great.
My Strawberry Pineapple Pachadi was quite a hit among my family and friends, so give that a try too. It was very yummy!! :-)
I have prepared Turnip Greens stir fry before and I prepared it the same way , but without the potatoes.

This was just a quick substitution and a rather tasty one and I want to share it with you. :-)

Turnip Greens Pachadi Recipe
Preparation:
1. Prepare the Turnips Greens stir fry in same manner as I've done here ( You can skip the coconut and potatoes if you'd like or else add them too, more yummy! )
2. Once cooled, add the sauted turnips greens to about 1-2 cups of Yogurt and stir well until the yogurt has become smooth and the greens have mixed well. (Add more Yogurt if necessary)
3. Season well with Salt if needed , remember the turnip greens are already cooked with some salt, so add only as required.

There - simple , quick and easy! One more thing that I would recommend is to cut the turnip greens into small thin strips and chop them into bits, else they'll look like Turnip Green Noodles in your yogurt :-)

Whats your favorite side dish for lunch or dinner? Do share your thoughts!!

-Manju

Jan 17, 2013

Oatmeal Banana n Chocolate chip Pancakes with Strawberry compote !

A warm hello to all...how are you all doing my dear friends? Today I'm back with another really good , healthy and tasty tasty Pancake recipe. "Necessity is the mother of all Invention" said someone long ago, well though I din't invent this recipe, it was definitely made out of necessity. :-)
You may have already guessed what my necessity was! Yes, my basket full of 9 over-ripe bananas, that we weren't able to finish as everyone at home was down with the flu :-P
I still have 6 more to finish, but then lets get to this one shall we?
Two down with these pancakes ;-)
So last weekend after I had posted on my facebook page for suggestions as to how to use these beauties, many suggested to make 'banana pancakes'. Now, I had already made some gorgeous Buttermilk Pancakes the previous week and had no plans on making some again. But then remember my 'necessity' ? ;-)
I was so very glad when I found a unique and healthy recipe for Oatmeal Banana Pancakes topped with Chocolate chips, and its so easy to make, all you need is a blender or mixer grinder, and of course the ingredients :-) These pancakes require no flour, no sugar , Only 'Oats and Bananas' and is totally healthy , except for the guilty pleasure of some chocolate chips!!

Another thing that was occupying space in my fridge were 5-6 lovely large strawberries, and I decided instead of topping my pancakes with honey or other sugary syrups, I would make a yummy Strawberry sauce or compote and trust me, it was the best decision ever made...period!! It turned out to be the perfect pairing for these pancakes with all its fruity goodness!
This recipe yielded about 5-6 pancakes, quite enough for the 3 of us. Double the amount if you want more.

Oatmeal, Banana n Chocolate chip Pancakes Recipe 
******************************************************
Recipe source : Adapted from Tasty Kitchen Blog
You'll need
Ripe Bananas - 2 medium (cut into chunks)
Milk - 3/4 cup ( I used skim milk , you can use as per preference)
Vanilla extract - 1/2 tsp
Oats - 1 heaped cup (can use Old fashioned Oats or 1 minute cooking Oats)
Baking powder - 11/2 tsp
Salt - a pinch
Chocolate chips - 2 tblsp (optional)

Directions
1. In a mixer grinder or blender, add the banana , milk and vanilla extract and blend until smooth.
2. Add the oats, baking powder and salt and again blend until the oats is fully grinded and a smooth batter is obtained. Set aside for few minutes for batter to thicken.
3. Heat a non-stick tawa/pan on medium heat with lightly coated oil or butter (i use spray on canola oil) and pour about 1/4 cup measure of the batter and spread it lightly.
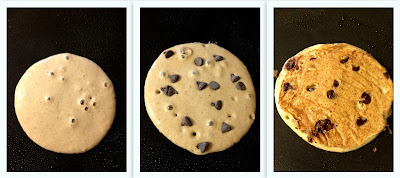
4. Place 4-5 chcolate chips on top of the pancake and cook until you see bubbles. Then flip over and cook until golden brown on the bottom (about 2 mins each side)
[ You may wipe the pan each time before making next set of pancakes , as the chocolate would have melted and may be present on the pan surface ]

Strawberry Compote / Strawberry Sauce Recipe
**************************************************
Recipe : My own version
You'll need
Large ripe Strawberries - 5-6
Water - 2 tblsp
Sugar - 1 tsp
Vanilla extract - 1/2 tsp (optional)

Directions
1. Wash well and chop the strawberries into small chunks and add it to a saucepan along with water and sugar and bring it to a boil over medium heat. Keep stirring constantly.
2. Once the sauce starts bubbling and thickening slightly add the vanilla extract and again stir for a minute and take it off the heat.
3. Let it cool completely before using!

The Pancakes were really soft and the bananas added a lot of flavor and enough sweetness and the Oatmeal obviously added a lot of fiber and goodness. The chocolate chips obviously took them to a higher level...hehe! I made 2 pancakes without any chocolate chips and they tasted great too.

So shall we dig in...? Slice them up , like you would slice a cake :-) Look how the chocolate chips have melted so nicely...


 And pour some of that delicious Strawberry sauce over it...mmmmmm!!

Overall experience : Almost like having a Banana Split for breakfast!! Trust me, after all it is Bananas, Strawberries and Chocolate!!! It's a combination made in heaven...

I hope you enjoyed them and will try them out. Its so simple, with all staple pantry ingredients, you must try it...and do let me know how it came out :-)

Another recipe I made with one of the Banana was Banana Pongal, which was again super good. Now for the remaining 6 bananas I'm considering to make Banana bread...but with a fun twist, so stay tuned!

-Manju


Jan 14, 2013

Sarkara Pongal & Banana Pongal....Happy Pongal everyone!

Happy Pongal and Makar Sankranthi to all who celebrate (although it may be a belated wish now) :-)
In the south of India, Pongal/Makara Sankranti is a harvest festival. Some of the items made with the newly harvested rice is various kinds of Pongal. Know more about the festival Pongal from here.

The special recipe I tried today for Pongal is Sweet Pongal ;-) Infact all the other lovely blogs out there (who posted some yummy Pongal recipes) literally made me crave insanely to have some sweet Pongal today. So all day in office today, I waited to get back home and immediately jump into making some Sweet Pongal.

And the result was instant success, Appu and I couldn't stop licking our spoons. Manish came home late and was so happy to get some yummy Pongal waiting for him and he finished the whole thing :-)
I made a simple Sarkara Pongal (prepared with Jaggery) and divided it and added some mashed banana into one half and made Banana Pongal too :-) The banana pongal was an instant hit with Appu, who ate a full bowl happily!

My pics are not so great as I took it when it was really dark outside, but this recipe is for keeps for sure!! It was super duper easy and everything was prepared within half an hour.
Sarkara Pongal
Sarkara Pongal Recipe
Recipe Source: Rak's Kitchen

You'll need
Raw rice - 1/2 cup
Moong dal - 2-3 tblsp
Jaggery - 1/2 cup (I used 5 cubes)
Water - 2 & 1/2 cups
Ghee - 3 tblsp
Salt - a pinch
Whole Cardamom (Elaichi) - 4
Dry Ginger powder - 1/4 tsp
Cashews - About 5-8 (halved)
Raisins - 1-2 tblsp
Oil/Ghee - for frying the nuts

Directions
1. In a pressure cooker, add 1 tblsp Ghee and roast the moong dal until mild brown and fragrant.
2. Wash the rice, and add the rice with 21/2 cups water into the cooker, cover and cook for 5-6 whistles. Turn off the heat and let it stand until cooled down. Once cooled open the cooker and mash the rice well.
3. Powder the jaggery and add it to a saucepan with just enough water to cover the jaggery and heat it until all the jaggery melts.
4. Crush the whole Cardamom pods. Add the crushed Elaichi and Ginger powder to the melted jaggery. Heat it again until the spices gets mixed well.
5. Strain the melted jaggery and add it to the mashed rice. Mix well and cook again on medium flame for 2-3 minutes adding the remaining 2 tblsp ghee little at a time. (If the pongal starts becoming too dry add some water or milk)
6. Lastly fry the Raisins and Cashew Nuts in some ghee or oil and add it to the Sarkara Pongal. Enjoy sweet and delicious Pongal warm!

If you have been following me on Facebook, you might have known of my basket filled with 9 over-ripe banana's :-)
I had asked for suggestions to my lovely readers as to what I should do with them. I got several lovely ideas , even a hair care technique. Check out the suggestions here.
Last Sunday I used 2 of them to make Oatmeal Banana Pancakes (i'll post it soon). And today I used another one to make Banana Pongal with half of the Sarkara Pongal I prepared above....and it was so so good!
Banana Pongal
Banana Pongal Recipe
Prepare Sarkara Pongal as described above. Mash 1 large ripe Banana with a fork and add about 5-6 heaped tablespoons of Sarakara pongal to it and mix well. Garnish with nuts and raisins.

The Banana Pongal was so creamy and sweet and my little guy simply loved it. As you can see he gobbled down spoonfuls and asks for more ;-)

So I hope you all will enjoy some delicious pongal by trying this out! See you all soon...

-Manju


Jan 12, 2013

Buttermilk Pancakes

Who loves Pancakes, raise your hands? ;-) Well my family surely loves it and its an occasional treat we treat ourselves to when we get bored of the usual Idly n Dosa n Upama etc for breakfast. And I've never made pancakes from a box mix ever and I'm pretty proud of that. ;-)

Pancakes are really easy to make from scratch! I usually always make whole wheat pancakes, but as I was out of whole wheat flour I made these with all-purpose flour. I had some buttermilk in the fridge, and I thought I'd put it up to good use ;-)
Buttermilk pancakes are so flavorful, soft and spongy and totally melt in your mouth delish!
My favorite part of eating pancakes are the different toppings...It could be fruits, jam, honey, maple syrup, chocolate syrup...yumm!! Savory options are available too, but I haven't tried any yet, so more on that later.
We enjoyed these beauties with some banana slices, strawberries and Orange marmalade....of course I drizzled some honey too on top of mine...
My little guy happily had a whole pancake topped with honey!
This recipe yields about 8-10 pancakes of 4"diameter (approx).

Buttermilk Pancakes Recipe
Recipe source : AllRecipes.com
You'll need
All purpose flour - 1 ½ cups
Baking powder - 3 ½ tsp
Salt - 1 tsp
Sugar - 1 tblsp
Buttermilk - 1 ¼ cups 
Butter - 3 tblsp (melted)
Egg - 1
Milk - 2 tblsp (optional)


Directions
1. In a bowl, sift together the all-purpose flour, baking powder , sugar and salt.
2. Make a well in the centre and add the buttermilk, melted butter and egg and mix well until the batter almost resembles cake batter. (If the batter is very thick, add 1 tblsp of milk at a time and loosen the batter)
3. Heat a non-stick pan/girdle on medium heat and lightly oil it.
4. Pour approx a ¼ cup of batter on to the pan and lightly tap it to spread it to around 4" diameter.
5. Brown slightly on both sides and serve hot with delicious toppings!!

I've tried this recipe several times and it has never failed me. Original recipe calls for Milk, I've substituted that with Buttermilk, still tastes great! So what are you gonna drizzle over your batch of pancakes? ;-)
Ahem...it was pretty difficult to get that above shot, balancing a huge honey jar on my left hand and heavy DSLR on my right, but I guess it came out ok...what do you think?  ;-)

-Manju