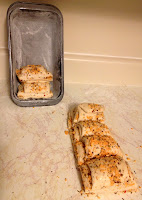
Anyway, I would have still not taken up bread baking if it hadn't been for Aparna Balasubramaniam, who reached out to her friends and fellow bloggers on facebook, asking them if they would be interested in baking one bread a month for the whole of 2013 along with her. She had a list of breads that she wanted to try and thought it would be fun if it was a group event and I'm so proud to be a part of this year long monthly project aptly named 'We Knead to Bake' .
Bread baking is a lot of fun and you can't wait to see the end result. Aparna wanted us to bake a Herb and Cheese pull apart bread for which she had provided recipe and instructions. A pull apart bread sounded like so much fun and it definitely is. Her recipe was eggless and I just loved that.
I started making the dough after breakfast last Sunday. Manish kept hovering around the kitchen tryingto see what I'm upto. I told him I was baking a pull apart bread and he had no clue what that was ;-)
I wanted to make use of the ingredients I had in my pantry and fridge so did not buy anything special for this. I flavored the dough with crushed Garlic and Red chilly. My fillings were simple - roasted Cumin seeds, dry Italian seasonings, low fat Cheddar cheese and few pinches of saumf powder.
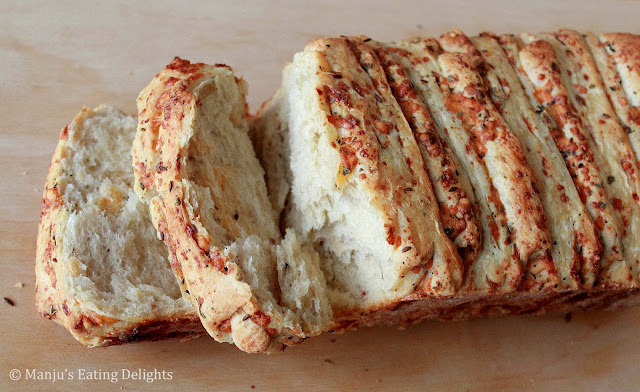
The bread was simply awesome. The dough rose perfectly. I had no fear of using yeast and went and ahead and followed all the instructions in Aparna's recipe and the result was a perfectly baked soft and flavorful pull apart bread loaf. As you can see below, the bread was so porous and soft, perfect to dip into some some sauce or soup and relish on! And the flavors from the herbs and cheese were simply outstanding!
One important step I missed out while setting up the pull apart bread was, I forgot to brush butter over the dough before topping it with the herbs n cheese. Due to this, my dough just stuck to itself while baking and became more like a herb n cheese whole loaf bread than a pull apart bread...so you please don't forget that step!! The butter helps to separate the individual layers after it bakes.There was some spicy Chipotle dipping sauce in the fridge and half the loaf was over within minutes :-)
For my little guy I spread a little bit of orange marmalade on his slice (in case the red chilli in the dough was too spicy for him) , and he really enjoyed it and ate almost half of a large slice. :-)
Bread baking takes some time as you want to give enough time for the dough to rise and rest. So a little planning ahead is good!! I've tried to give step wise pics (but my kitchen light is awful, so the pics look yellow :-) )
Herbs and Cheese Pull apart Bread Recipe
Recipe source : Aparna @ My Diverse Kitchen
You'll need
For the Dough:
Warm Milk - 1/2 cup
Sugar - 1 tsp
Active dry yeast - 2 tsp (I used a whole sachet of the instant yeast we get here , almost 2.25 tsp)
All-purpose flour - 2 3/4 to 3 cups (I used 3 cups)
Salt - 1 tsp
Butter (soft at room temperature) - 25gm or 4tblsp
Garlic-Red Chilli paste - 1 to 1.5 tsp (3 garlic cloves + 2 dry red chillies)
Milk - 3/4 cup + 3tblsp for brushing over the bread
For the Filling:
Melted Butter- 15 to 20gm (about 3-4tblsp)
Dried Italian seasoning herbs - 2 tsp (contains dried oregano, thyme, parsley)
Roasted cumin seeds - 2 tsp
Saumf powder - 2-3 pinches (optional for flavor)
Grated cheddar cheese - 1/2 cup
Directions
1. In a small bowl, dissolve the sugar and the yeast in 1/2 cup of warm milk. Keep aside for about 5 minutes till the yeast mixture bubbles up.
2. Grind 3 cloves of garlic with 2 dry red chillies to a coarse paste.
3. Put 3 cups of flour, salt, softened butter, and garlic-red chilli paste in a large bowl (I used my Kitchen Aid stand mixer with the blade) and pulse a couple of times to mix.
4. Then add the yeast mixture and the 3/4 cup of milk and knead (use dough hook if using Kitchen Aid mixer) till you have a soft, smooth and elastic/ pliable dough which is not too sticky. Add a little extra flour if your dough is sticking. Oil your palms and shape the dough into a ball and place it in a well-oiled bowl, turning the dough to coat it completely with oil.
Cover and let it rise for about 1 to 1 1/2 hours or until almost double in volume.
5. Dust your work surface lightly with flour. Deflate the dough and shape it into a square and roll the dough out into a larger square that is about 12" by 12".
6. Brush the surface of the square with the melted butter. Evenly sprinkle the herbs, cumin seeds, powdered saumf and the grated cheese. Use a rolling pin to very lightly press the topping into the dough to ensure the topping doesn't fall off.
7. Using a pizza cutter, slice the dough from top to bottom into 5-6 long and even strips – they do not have to be perfect. Lay each strip on top of the next, with the topping facing upwards, until you have a stack of the strips.(I kept the 2 strips cut from the sides in the middle of the stack so it looks neater and folded up any strips that became too long)
8. Using a pastry scraper or a sharp knife, cut straight down through the stack dividing it into 6 equal pieces (6 square stacks).
9. Butter and lightly flour a 9 x 5 loaf pan. Layer the square slices, cut sides down into the loaf tin.(I kept my load standing vertically and placed each of the cut up slices over the other)10. Cover the loaf tin dough with a towel (or kitchen towel) and allow the dough to rise for an hour.
11. Lightly brush some milk over the top of the loaf and Bake the dough at 350F for about 30 to 40 minutes until it is done and the top is golden brown.
I'm really happy with the end results. I took some of the loaf to office and my colleagues too liked it a lot and are now waiting for me to post it on the blog :-) One of my colleagues said its really nice that its not very dense, but a nice airy and fluffy , flavorful loaf.
The other bloggers who took part did some really interesting twists and tweaks to this recipe with different filling options etc and they all look great. Do check them all out , listed at the end of Aparna's post.
Can't wait to see what Aparna is gonna come up with next for February...so until then...Tata!! :-)
-Manju


So perfectly done Manju :-) little one seems to enjoy them... have been wanting to try this when I saw this click in FB, will sure try it sometime...
ReplyDeletewow, that was a superfast comment :-) Thank you Priya and yes, do try it, you'll really enjoy it!
Deletenice pics.. looks yummy.. i think kiddo loved it a lot..
ReplyDeleteSpill the Spices
Wow ! Frankly telling, love the lil pic most when compare to Bread pics... :P
ReplyDeletehttp://recipe-excavator.blogspot.com
real beautiful bread... me being new to food blogging, i wanted to participate, but then maybe after a couple of months once i get the initial hang of it!!! :) the lil one is so cute... :)
ReplyDeleteLooks so soft and loving the texture manju.
ReplyDeleteThe bread looks so soft, spongy & irresistable. It is one of the things in my to do list. I loved the second picture of your lil one where he is so concentrated in enjoying the bread...so cute:)
ReplyDeleteWow Manju! That bread looks so flaky and buttery. I bet the little one enjoyed it!
ReplyDeleteOhh kiddo seems to be enjoying this to the fullest!! So well done!
ReplyDeleteYummy and irresistible..love it
ReplyDeletelovely bake and your kid seems to enjoy it the most
ReplyDeletebeautiful pics,Manju..that looks a flavorful bread,love to try sometime :)
ReplyDeleteJoin EP event-Nutmeg OR Parsley @ Chef Mireille's Global Creations
This bread is so cool!! I love that your son is enjoying it so much. :)
ReplyDeleteYOur bread looks really good. Like the additon of saunf. Can see your little one really nejoyed his bread. :)
ReplyDeleteStunning and super tempting bread, looks simply beautiful and gorgeous.
ReplyDeleteCan imagine how much more awesome would it be if u hav added butter....loved the bread....awesome....chweet little kiddo...
ReplyDeleteThat bread looks stunning and delicious. Beautiful loaf and lovely clicks. :)
ReplyDeleteThat looks so delicious! Love the toppings/flavoring your added.
ReplyDeleteAnd the pic of your son eating the bread - SO cute.
i love pull apart breads..they look great n its great to share.. m yet to try a herb and cheese filling though.. :)
ReplyDeleteThe bread looks so perfect and it must those seasonings - love the pics too :)
ReplyDeletereally amazing ...!!!!!!!!!!!:)
ReplyDeleteCan we leave it overnite in fridge after putting it in baking pan for the last rise n bake in morning after keeping it at room temp let say for an hour?
ReplyDeleteI haven't done that so I wouldn't be able to give a positive answer to that. I've heard you can freeze the dough before first rise and then thaw it and let it rise at room temp and then bake, but I havent done that either, so if you try any of these techniques do share your experience :-)
Delete